See you back here for fresh posts in the New Year!


See you back here for fresh posts in the New Year!


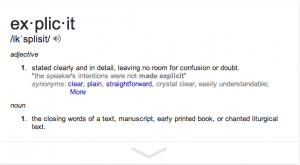
Ruth and I have been focusing on being more explicit. And if you know me, that doesn’t mean expanding my potty mouth. I’m quite….colourful in my diction. What I mean is, Ruth and I are working on being more clear. Perhaps saying a little more than we’re used to. Maybe writing a little more than we’re used to. Making sure we, and our clients, and our colleagues are all on the same page.
When you spend as much time together as Ruth and I do and also think almost exactly the same way, we know exactly what the other is thinking. We barely need to say a word to one another. Usually we finish each others sentences, or chime in to a conversation in stereo with the both of us saying the exact same thing. That’s what makes it so hard sometimes to explain to others exactly what we mean. Since we seem to have a brilliant insight into each others minds – we barely need to say much to know exactly what we need to do. So what does being explicit actually mean? See below!

All this talk about being explicit in our training classes, our written mediums (reports to clients), and even our emails had a great connection with process improvement. We’ll often ask questions of our clients like “What is your customer on-boarding process?”. Here are a few typical responses…

“Well, we do this….and then maybe this….and sometimes this….and Barry always does this (but I don’t do it that way)….”
or
“Well, it depends, sometimes its like this, but if this happens I might do it this way….or that way….I’m not really sure”.
When your processes aren’t explicit it means you don’t really have a process, and you are going with the flow and changing things ad-hoc – which is great if you are a new organization that is still getting into its groove. But as soon as you start to mature, things may start to fall through the cracks.
By documenting a process and clearly defining the roles, responsibilities, and tasks in a step, you and the team you are functioning with are able to very clearly understand what they need to do, in what order, with what inputs, and producing what outputs – consistently – every time. You start to understand what works and what doesn’t, and be able to improve your process.
So how can you get your organization on board to be more explicit with their processes? Other than calling us in for a consult you mean? What about facilitating your very own process mapping session to understand what everyone is doing?
Depending on the number of changes and whether they make sense, you may be able to finalize a new document – or you might need an in person session to validate your work. Either way, you will end up with a current state process map! Hooray.
And now you can be explicit. *#&*$(&# that was a lot of work!
Now what? Well, you can look to our past blogs like:
Step Three: Imagine It! In which you brainstorm potential solutions to process issues and draw how they might look.
Step Four: Prove It! In which you build the case for the improved process you want to implement.
But at a minimum, you’ve gained some clarity on a process, and have a good idea of what’s going on and how to fix some things that have been the pebble in your shoe.
Let us know if you’ve had experience (good or bad!) with process mapping sessions and whether any of the tools above resonate with you. Please use the comment space below or tweet us @whiteboardcons! And don’t forget to send us any general process improvement questions or suggestions for future blogs.
Until next time,
Nicole

We’re finally at the last of the five steps of The Whiteboard Way© – Talk About It.

“That’s a step?” you ask, “just talking about something?”
Why yes, yes it is.
There is a trick of course – it’s not just talking about what you’ve been doing. It’s communicating the right information, to the right people, using the communication method that they prefer. Or, it’s about effective communication.
In the last four posts we’ve taken you through all the basic steps for properly defining a problem, imagining
all the potential solutions, and proving that the solution you choose is the right one.
Step One: Define It! In which you describe the problem without assuming a solution.
Step Two: Draw It! In which you visually express the problem in its current state.
Step Three: Imagine It! In which you brainstorm potential solutions and draw how they might look.
Step Four: Prove It! In which you build the case for the solution you want to implement.
Now it’s time to discuss the biggest roadblock to effective process improvement i
nitiatives – effective communication, or the lack thereof.
You’ve got the best idea in the world. You know it’s going to be big – your boss is going to love it, your colleagues are going to love it – heck, you may even get a raise. You’ve been doing all the steps of The Whiteboard Way©, working away at your desk on your lunch hours and even a couple of evenings at home. You’re super excited, and you finally are ready to let everyone know.
One morning as you and your colleagues are settling in for the day, you tell them all about your plans. A couple smile and say “good for you” and then sit down at their computers and open their eMail. One chuckles and says, “good luck with that”. And another says, “but that will change my work!”
You’re completely deflated. Don’t they see that this is a good thing?
Later that morning you have your weekly one-on-one with your boss and you tell her all about your amazing idea. You pull out your process maps and explain what you’ve been working on.
“How much is this going to cost?” she asks. And before you can answer, “what does the rest of the team think of this plan?”
“Uh, well, I haven’t had time to talk to them about it,” you reply, “and as for cost, I haven’t looked at that. But look how much we’ll save!”
“I’m sorry, but I need to know the cost. You know our budget is tight. And it looks like this process impacts the others – you need to make sure they’re on board.”
And that’s the end of that. What went wrong????
So Many Things.
There are four key elements to the “Talk About It!” stage of The Whiteboard Way©:

Let us know if you’ve had experience (good or bad!) with communication and process improvement projects, and whether any of the tools above resonate with you. Please use the comment space below or tweet us @whiteboardcons! And don’t forget to send us any general process improvement questions or suggestions for future blogs.
Until next time,
Ruth.